
A led drop ceiling lights installation checklist saves time because most project delays come from missed fit, wiring, or support details, not from the light fixture itself. A dropped ceiling, also called a suspended or T-bar ceiling, is a secondary ceiling hung below the structural ceiling according to Wikipedia's definition of a dropped ceiling, and that structure changes how LED panels, troffers, and retrofit fixtures should be installed. For commercial property owners, electricians, and facility teams, the goal is simple: confirm compatibility before anyone cuts tile or opens a junction box. If you want more commercial lighting planning guides, start with The JQZ Lighting Journal.
What to verify before you buy or open a fixture box
The first checkpoint is confirming that the luminaire matches the ceiling grid, room use, and electrical setup already in place. Many installation problems start when a 2x4 panel is ordered for a 600x600 metric grid, or when a driver needs dimming control that the site does not have.
A practical pre-install review should cover fixture type, grid size, voltage, controls, and access above the ceiling. That matters in offices, warehouses, retail spaces, and renovation projects where older wiring and mixed ceiling systems are common.
Key takeaway: fit and power compatibility should be approved before scheduling labor, because ceiling tile changes and rewiring cost more than careful planning.
H3: Pre-purchase checklist for LED panels and troffers
Use this checklist before materials arrive:
- Confirm ceiling module size:
2x2,2x4, or metric equivalent - Check whether you are replacing a troffer, adding a flat panel, or retrofitting existing housing
- Verify input voltage and branch circuit capacity
- Confirm driver type and whether
0-10V, non-dim, or other controls are needed - Review local code, permit, and inspection requirements
- Check plenum rating and environmental suitability if required
- Measure plenum depth and note obstructions above the grid
- Confirm emergency lighting or backup requirements for egress areas
If your project includes broader fixture selection, the planning advice in commercial LED lighting selection guides can help you narrow fixture types before installation day.
The tools, materials, and site conditions that make installation smoother
The right tool set reduces rework because drop ceiling lighting jobs involve both electrical work and ceiling-grid handling. Competitor guides consistently cover screwdrivers, wire strippers, drills, and basic hand tools, but the stronger approach is to pair tools with site checks, especially for commercial projects.

You also need a clean access plan above the ceiling. HVAC ducting, sprinkler lines, and cable trays often limit where drivers, support wires, and junction connections can sit.
H3: Core installation kit by task
| Task | Tools or materials | Why it matters |
|---|---|---|
| Layout and measuring | Tape measure, marker, laser or straightedge | Prevents misalignment in visible ceiling grids |
| Electrical prep | Non-contact voltage tester, wire stripper, connectors | Helps verify power isolation and clean terminations |
| Mounting and support | Screwdrivers, drill, support wires or brackets | Keeps fixtures secure beyond resting in the grid |
| Ceiling handling | Ladder, replacement tiles, utility knife if approved | Helps avoid damaged tiles during fitting |
| Final commissioning | Light meter if available, control tester | Confirms output and dimming response |
Basic tools alone are not enough. Make sure the ladder height matches the ceiling, the area below is cordoned off, and replacement tiles are on site in case brittle mineral fiber panels crack during removal.
H3: Site readiness checks before power is isolated
Run through these conditions before your electrician starts:
- Clear inventory is on site, including fixtures, drivers, whips, and mounting accessories.
- The circuit and panel schedule are identified.
- Occupants know when power shutdown will happen.
- Ceiling access is safe, with no blocked lifts, stock, or shelving below.
- Other trades are coordinated so no duct or sprinkler work conflicts with the lighting layout.
For contractors managing upgrades across multiple rooms, The JQZ Lighting Journal often frames lighting projects as coordination work first, fixture work second. That is a fair way to think about suspended-ceiling installs in 2026.
Step-by-step installation checklist for a suspended ceiling retrofit
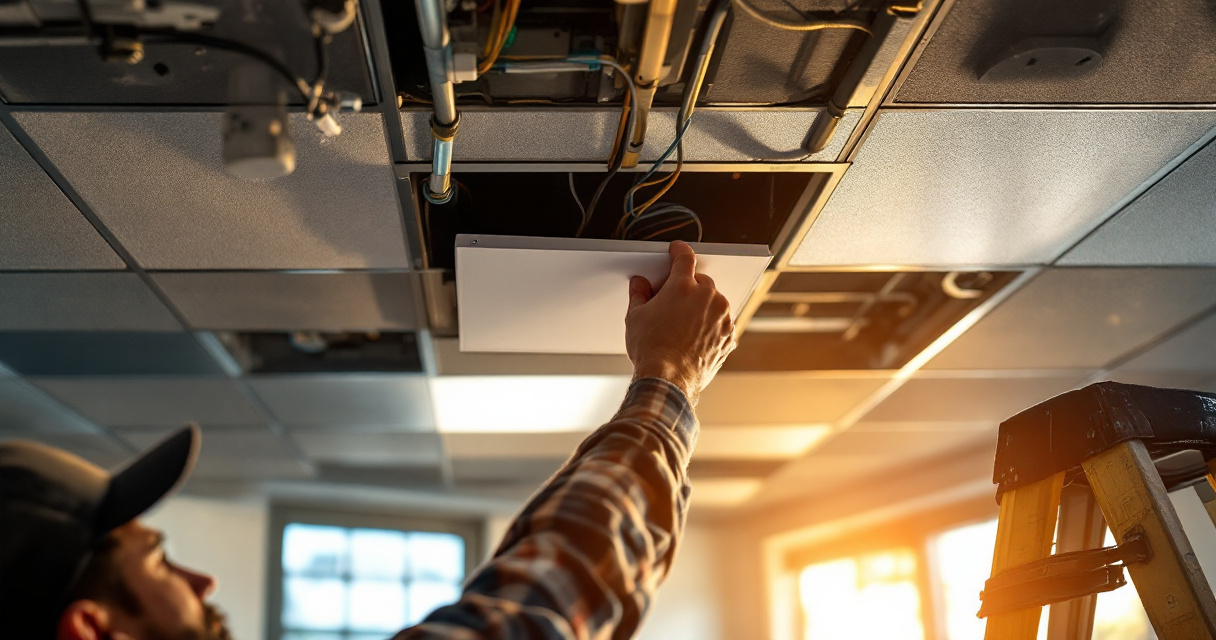
A reliable install sequence starts with power isolation and ends with testing under normal operating conditions. The exact fixture design varies, but most LED panel and troffer replacements follow the same flow: remove the old unit, protect the grid, make electrical connections, add support, seat the fixture, then test.
This is where many crews move too fast. Drop ceilings can hold a fixture in place, but the grid should not be assumed to provide all required structural support on its own.
H3: Installation sequence that keeps rework low
- De-energize the circuit and verify absence of voltage.
- Remove the existing fixture or ceiling tile carefully.
- Inspect the grid for bent tees, damaged cross members, or weak corners.
- Check fixture orientation, driver location, and cable reach before lifting into place.
- Make wiring connections according to the fixture documentation and local code.
- Add independent support wires, brackets, or safety supports if required.
- Seat the fixture squarely in the grid without twisting the frame.
- Restore power and test switching, dimming, and uniform illumination.
- Reinstall or trim surrounding tiles so the ceiling plane stays clean.
- Document circuit location, fixture model, and any driver settings for maintenance.
Good installations look easy because the crew checked support, access, and controls before the fixture ever left the floor.
H3: Final acceptance points before you sign off
Before handover, verify:
- No rocking, sagging, or visible frame gaps
- Consistent light color and output across the room
- Dimming controls work smoothly if specified
- Emergency operation works where required
- Ceiling tiles are intact and aligned
- Spare parts, model numbers, and circuit notes are recorded
If you are updating a retail or office fit-out, it also helps to compare new fixture spacing with your broader commercial interior lighting layout considerations so the finished space feels even, not patchy.
Common installation mistakes and how to prevent expensive callbacks
Most callbacks come from avoidable setup errors, not from LED technology itself. The usual issues are poor sizing, unsupported fixtures, mismatched controls, and rushed testing.
Another frequent mistake is treating all ceiling grids as identical. Older suspended ceilings may have wear, nonstandard dimensions, or prior modifications that make a simple swap less simple.
H3: The four errors that show up most often
- Wrong fixture size: Measure the actual opening and confirm the grid standard before ordering.
- No independent support: Follow code and manufacturer requirements instead of relying only on the T-bar grid.
- Driver and control mismatch: Confirm dimming compatibility before install, not after flicker complaints appear.
- Skipping final commissioning: Test under real operating conditions, including occupancy controls if used.
A broader lesson comes from retrofit research. A 2024 study in Buildings examined retrofit strategies tied to better living conditions and well-being in UK social housing, underscoring that upgrade quality matters, not just the act of replacing old equipment with new study PDF. While that paper is not about ceiling lights specifically, the practical takeaway still fits commercial projects: installation quality shapes outcomes.
H3: When to stop and bring in a licensed electrician or engineer
Bring in a qualified professional when you find unknown wiring, damaged conductors, emergency circuits, control integration issues, or structural concerns above the ceiling. The same goes for projects involving occupancy sensors, daylight harvesting, or large-scale panel retrofits tied to energy upgrades.
If your team needs a planning reference before scope review, check the educational content on jqzlighting.com and compare fixture specs, ceiling conditions, and controls in one place before labor starts.
How this checklist fits 2026 projects and what to expect next
Current drop ceiling lighting projects are less about basic lamp replacement and more about coordinated upgrades across controls, energy use, and maintenance planning. Top-ranking 2025 articles focus on tools, wiring, and installation steps, but many still underplay control compatibility, documentation, and ceiling-condition review.
That gap matters because modern commercial installs increasingly pair LED panels with dimming systems, occupancy sensing, and phased renovation schedules. Your checklist should now include commissioning notes and future service access, not just the day-one install.
H3: A smarter checklist for 2026 and beyond
Use a checklist that goes beyond the fixture:
- Record driver location for future maintenance
- Note control zones and dimming settings
- Photograph above-ceiling conditions before closing the grid
- Keep model numbers and replacement part data on file
- Flag rooms with after-hours access restrictions for future service
The JQZ Lighting Journal platform is most useful here because spec, installation, and maintenance decisions often overlap. For contractors and facility managers, that overlap is where costly callbacks usually start.
Conclusion
A strong led drop ceiling lights installation checklist should help you verify fit, power, support, controls, and testing before the first ceiling tile moves. That approach protects your labor budget and gives owners a cleaner handoff with fewer surprises later. For your next office, warehouse, retail, or renovation lighting project, build the checklist into your scope review, then use The JQZ Lighting Journal as your planning reference and head to jqzlighting.com for more practical commercial lighting guidance.


